

Let’s learn how to deploy a Serverless web application using AngularJS and AWS S3.
In this article, we are going to learn how to deploy our AngularJS web app to AWS S3 as quick as possible.
Here is what we will cover:
- Create a simple AngularJS application
- Configure an S3 bucket for static web hosting
- Deploy 🎉
Prerequisites:
- AWS Account created
- AWS IAM User
- AWS CLI installed (and additional dependencies)
- AWS Credentials Locally Setup
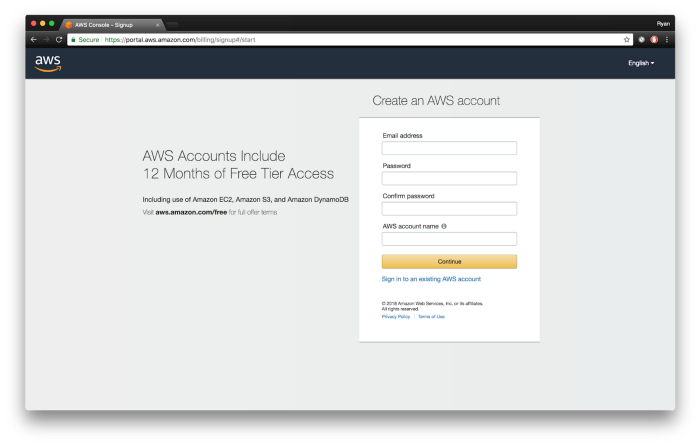
Setup your AWS Account
Create an account, https://portal.aws.amazon.com/billing/signup.
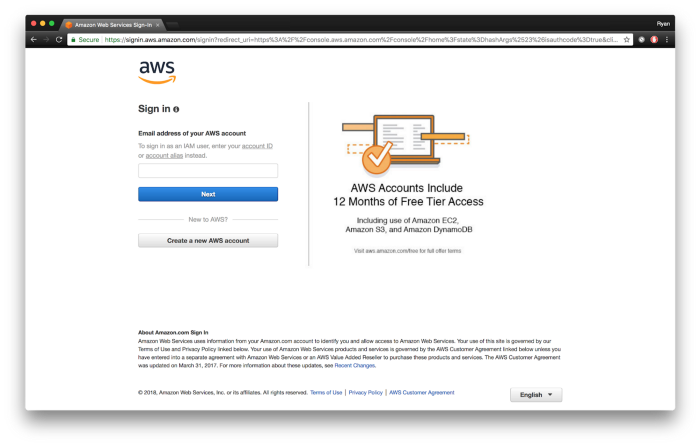
Log in to the AWS console, https://signin.aws.amazon.com/signin.
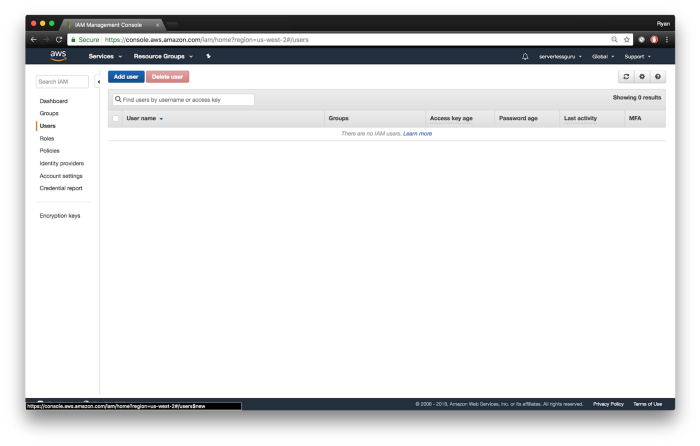
Click Services at the top left and search for IAM.

On the IAM console, we need to create a user for the Serverless Framework. Giving the Serverless Framework permission to create, update, and delete resources on AWS. Click Add user.
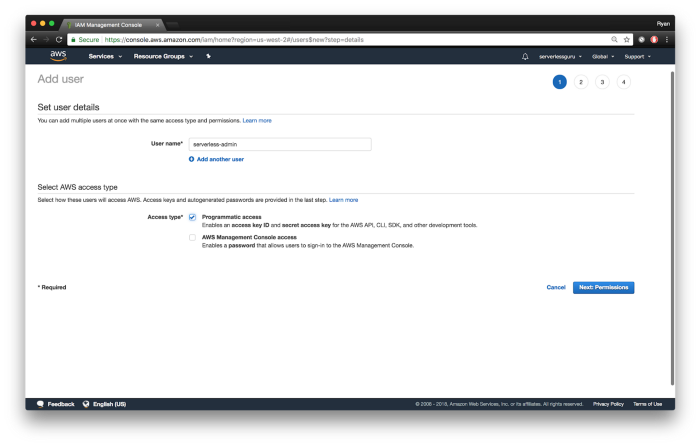
Give the user the name serverless-admin with Programmatic accessselected. Click Next: Permissions.
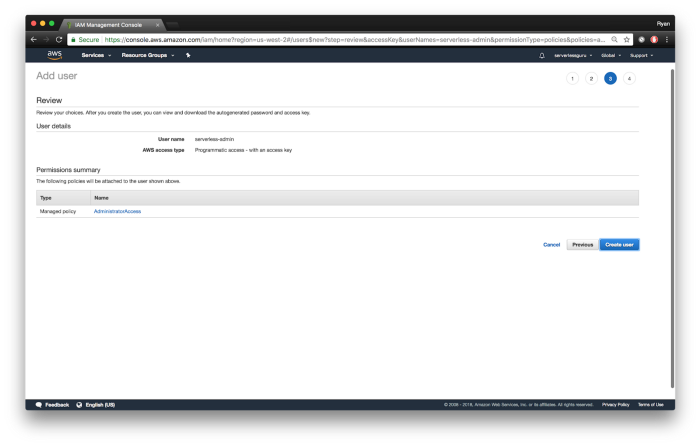
Switch to the Attach existing policies directly tab and select AdministratorAccess (for testing). In the future, make sure to scope the IAM permissions based on your level of access. As this is not a deep dive into IAM we will keep it simple. Then click Next: Review.

Now hit Create user.
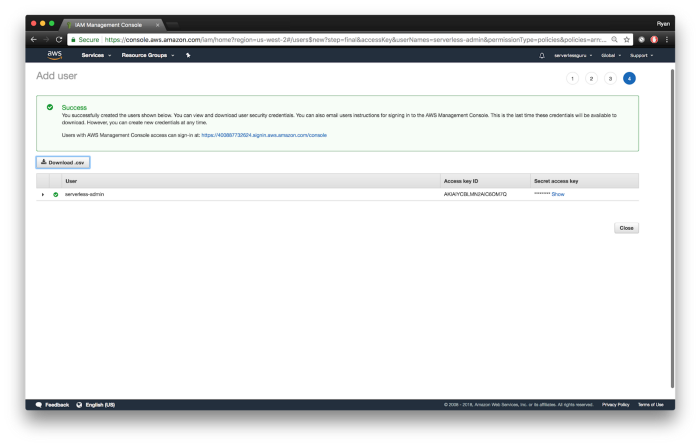
We need to copy the Access Key ID and the Secret Access Key for later use. So click Download .csv. Click Close.
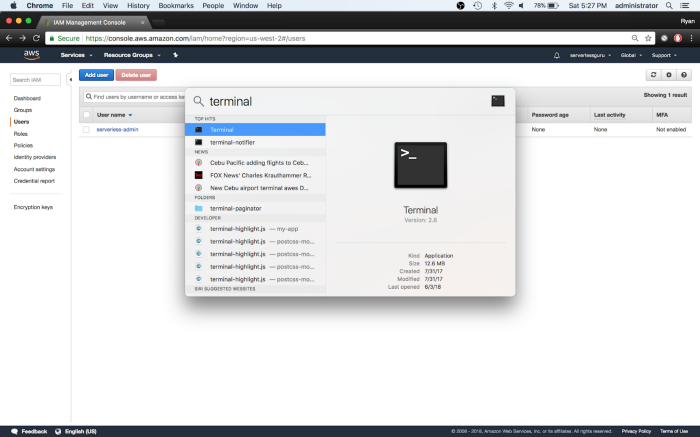
Now we’re ready to set up our local computer for deployments. To do that, open up Spotlight (Command–Space bar) then search for terminal.
With the terminal open, it’s time to install the AWS CLI.
Once the AWS CLI has been installed, copy the following command passing in your Access Key ID and your Secret Access Key from the file you downloaded called, credentials.csv. More information, here.
Awesome, now that we have AWS CLI and local configuration squared away. Let’s download some dependencies.
Install Node/Npm:
Sweet, now our setup is complete. Let’s jump into creating our basic AngularJS app.
Step 1 — Creation of your App
If you already have an Angular project setup you can skip this step. Otherwise, I will show you how to get started.
Setup Angular CLI
You can learn more about Angular and the CLI here. In your terminal enter the following command.
This will set up the Angular CLI. Next, let’s create our AngularJS project.
Change into the project directory.
Now you can serve it up locally.
That’s it! We now have our basic Angular app.
Step 2 — Setting up S3 Static Hosting
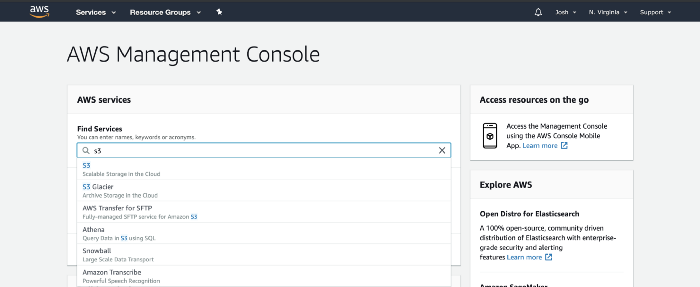
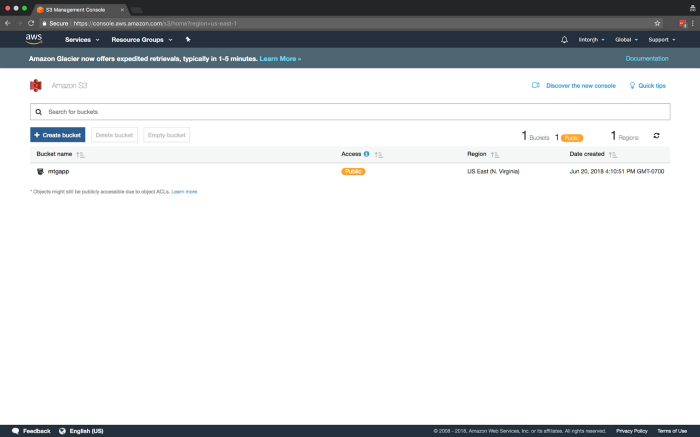
Let’s start with navigating to the AWS console and searching for S3.
Create an S3 bucket.

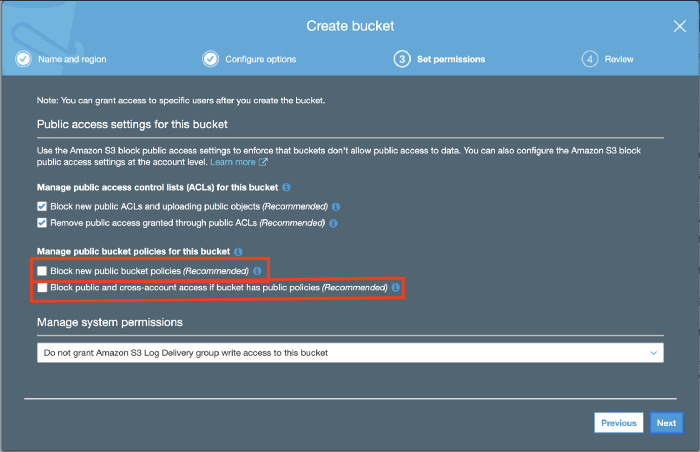
You can skip the Configure options page but on step 3 make sure to uncheck Block new public bucket policies(Recommended) and Block public and cross-accountaccess if bucket has public policies. Otherwise, we won’t be able to allow users access to our bucket and allow them to see our site.
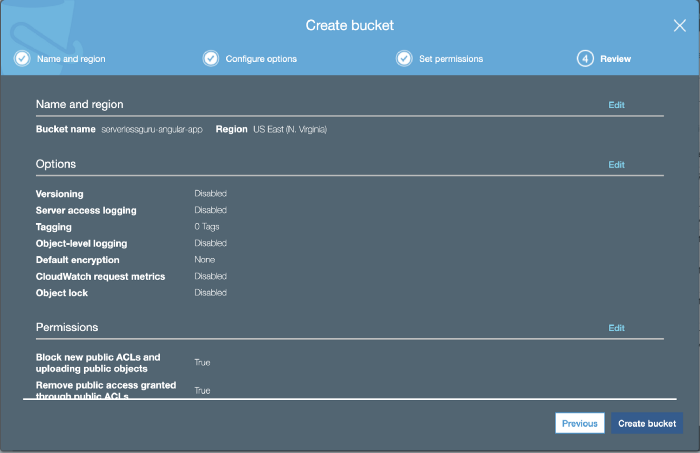
On the review section and create the bucket.
Once you create the bucket you will be back at the main S3 page.
Step 3 — Upload to AWS via AWS Console
Build the AngularJS app
Pro-Tip: Make sure to run ng build <project-name> --prod to have a production version of your app ready to go.
Upload AngularJS app
Select your bucket. Then click Upload. We are going to upload the AngularJS dist/directory which was created from ng build command.

Only change the Manage public permissions field. Select Grant public read access to this object(s) and hit Next.
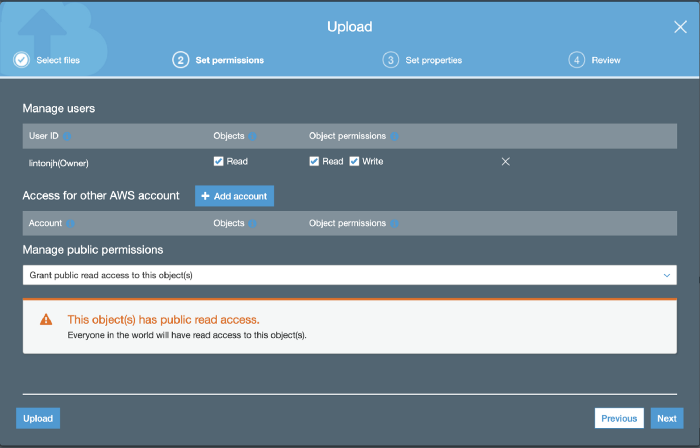
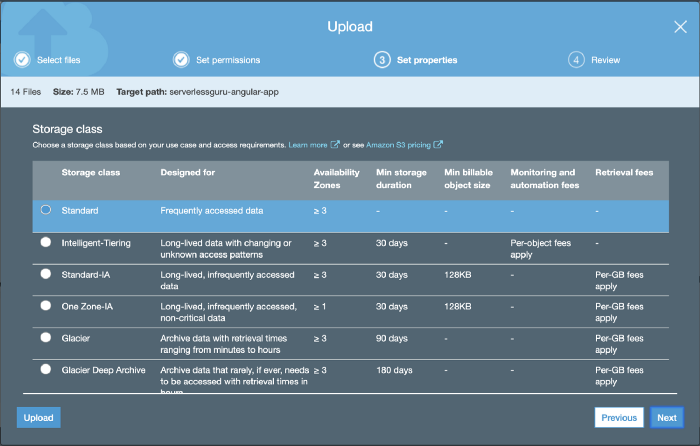
Use the default standard plan for storage class and hit Next.
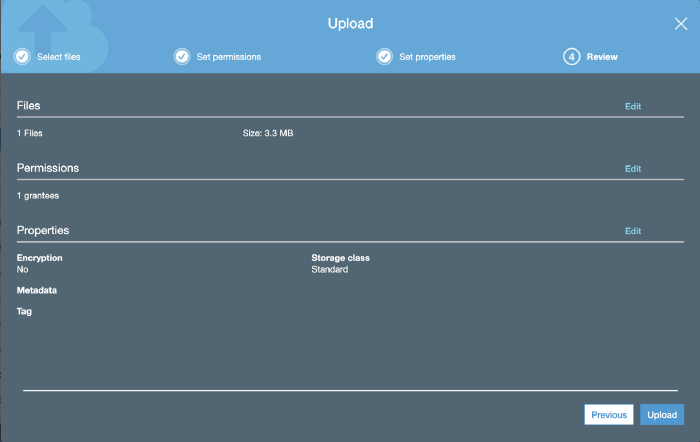
Then on the next page hit Upload.
Configure Static web hosting
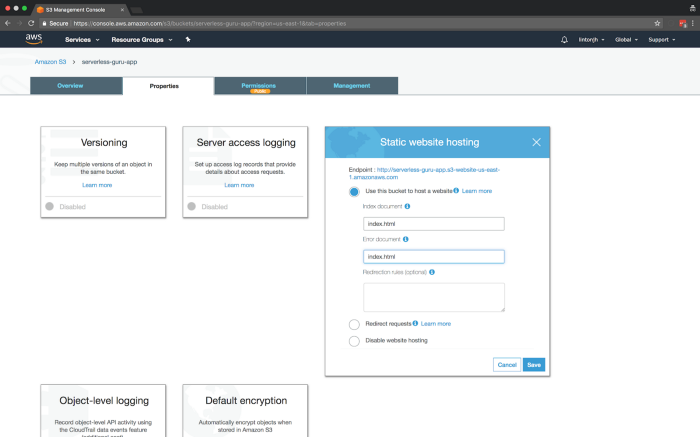
Click the Properties tab. You should see an option for Static website hosting, click it and a modal will pop up. Select Use this bucket to host a website option and enter index.html for the Index document and the Error document. You can leave the rest of the options blank and hit save. Important take note of the Endpoint link. That is going to be how you access your website!
Create S3 Bucket Policy
Now that our S3 bucket is set up for Static hosting we need to set up permissions. To do this click the Permissions tab and select Bucket Policy. You can copy and paste what I have below, swapping out example-bucket with your bucket name.
This gives users read access to your bucket. Go ahead and hit save.
Note: You’ll get a warning letting your know you’ve given public access to your bucket.
Great work. Everything on the AWS side is ready to go! 🎉 🎉
Step 4 —Setup automated deploys to AWS
Let’s open up our AngularJS app in a text editor and create a deployment script to make updating our Angular application easier.
Update package.json
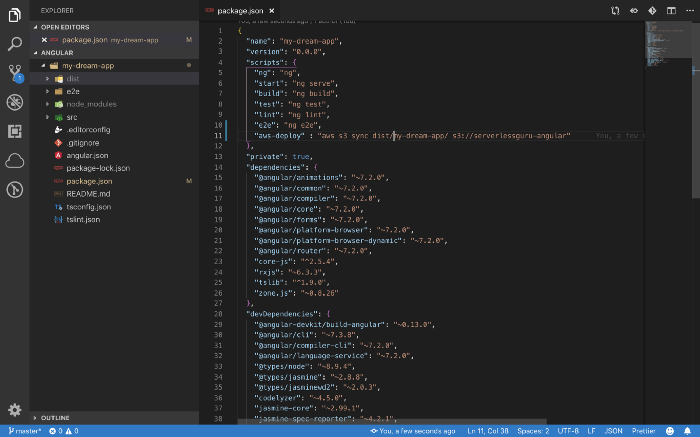
Open up your package.json file. Inside there is a section called scripts. We’re going to add a script called aws-deploy which will use the AWS CLI to sync our build directory to our S3 bucket. Swap out example-bucket for your bucket name and copy/paste aws s3 sync dist/my-dream-app/ s3://example-bucketinto your package.json file using the image below as a guide.
Now we can deploy our app by running the below command from our project directory. This will build the AngularJS app and deploy it to AWS.
Now open up your S3 bucket in the AWS Console and copy the URL from the Static Web Hosting modal. The URL should be similar to:
example-bucket.s3-website-us-east-1.amazonaws.com
Navigate to the URL and you should see your app.

Congratulations 🎉! You created, deployed, and hosted an AngularJS web app onAWS using S3 Static Web Hosting!


%20(1).svg)

.svg)


