

Are you still using hard coded access keys and secrets with administrator access locally with your AWS-CLI? If so, then this article is for you!
In this article you’ll learn how to protect your AWS account credentials easily in less than 5 minutes, even if you are an absolute beginner!
Since we follow the AWS best practices for our work, the same should be the case when it comes to local development using our personal accounts. AWS CLI with IAM credentials helps us develop and deploy applications locally.
Instead of using long term credentials with an access key and secret, we’ll be setting up the CLI with short-term credentials for more enhanced security. Of course, we do not want our access keys and secrets accidentally exposed, leaked or stolen.
I have tried using two different approaches to achieve this:
- Using AWS IAM roles
- Using AWS IAM Identity Center (recommended approach)
1. Using IAM roles - How does it work?
In this approach, short-term credentials are created by assuming a role using user credentials. When assuming a role, a temporary session token will be created and valid for 1hr by default with a maximum of up to 12 hrs (configurable). The IAM user created for the CLI should not have any other permission except AssumeRole. All permissions needed for development are added to the role and are assumed. By adding multi-factor authentication for users, our credentials are more safe and secure.
The idea is to provide zero permission for the user, while adding the required permissions to the role and assume it temporarily using MFA authorization.
Steps to configure CLI using IAM assumed roles
Let's start with the console. Do not forget to replace any account related information such as AccountID and ARN from code snippets when copying.
Follow the steps below on the AWS console
- Create a new IAM user with access keys and enable MFA.
- Create a new IAM role with a custom trust policy. Next, copy the trust policy below:
- It allows the user (principal) to assume this role.
- It also adds a condition to check if the user is authenticated using MFA.
{
    "Version": "2012-10-17",
    "Statement": [
        {
            "Sid": "RoleTrustPolicy",
            "Effect": "Allow",
            "Principal": {
                "AWS": "arn:aws:iam::<YOUR-ACCOUNT-ID>:user/<YOUR_USER_NAME>"
            },
            "Action": "sts:AssumeRole",
            "Condition": {
                "Bool": {
                    "aws:MultiFactorAuthPresent": "true"
                }
            }
        }
    ]
}- Add an inline policy for the new user to assume the role that we just created.
{
      "Version":"2012-10-17",
      "Statement": [
        {
          "Sid":"AssumeRolePolicy",
          "Effect":"Allow",
          "Action":"sts:AssumeRole",
          "Resource":"arn:aws:iam::<YOUR-ACCOUNT-ID>:role/<YOUR_ROLE_NAME>"
        }
      ]
}- Then, add necessary permissions for the new role created.
Steps for configuring CLI:
- Add the following profiles to your .aws/credentials file. For beginners, make sure you have AWS-CLI installed on your local system.
[MFAUser]
aws_access_key_id=<XXX-YOUR-IAM-USER-ACCESS-KEY>
aws_secret_access_key=<XXX-YOUR-IAM-USER-ACCESS-SECRET>
region=<YOUR-REGION>
[DeploymentRole]
role_arn= arn:aws:iam::<YOUR-ACCOUNT-ID>:role/<YOUR_ROLE_NAME>
source_profile=MFAUser
mfa_serial = arn:aws:iam::<YOUR-ACCOUNT-ID>:mfa/<YOUR-MFA-DEVICE-ID-NAME>- Now, run this command:
aws s3 ls --profile DeploymentRole
- CLI will prompt you asking to enter MFA code. Enter the code and start deploying 🚀

2. Using AWS IAM Identity Center - No, it is not IAM!
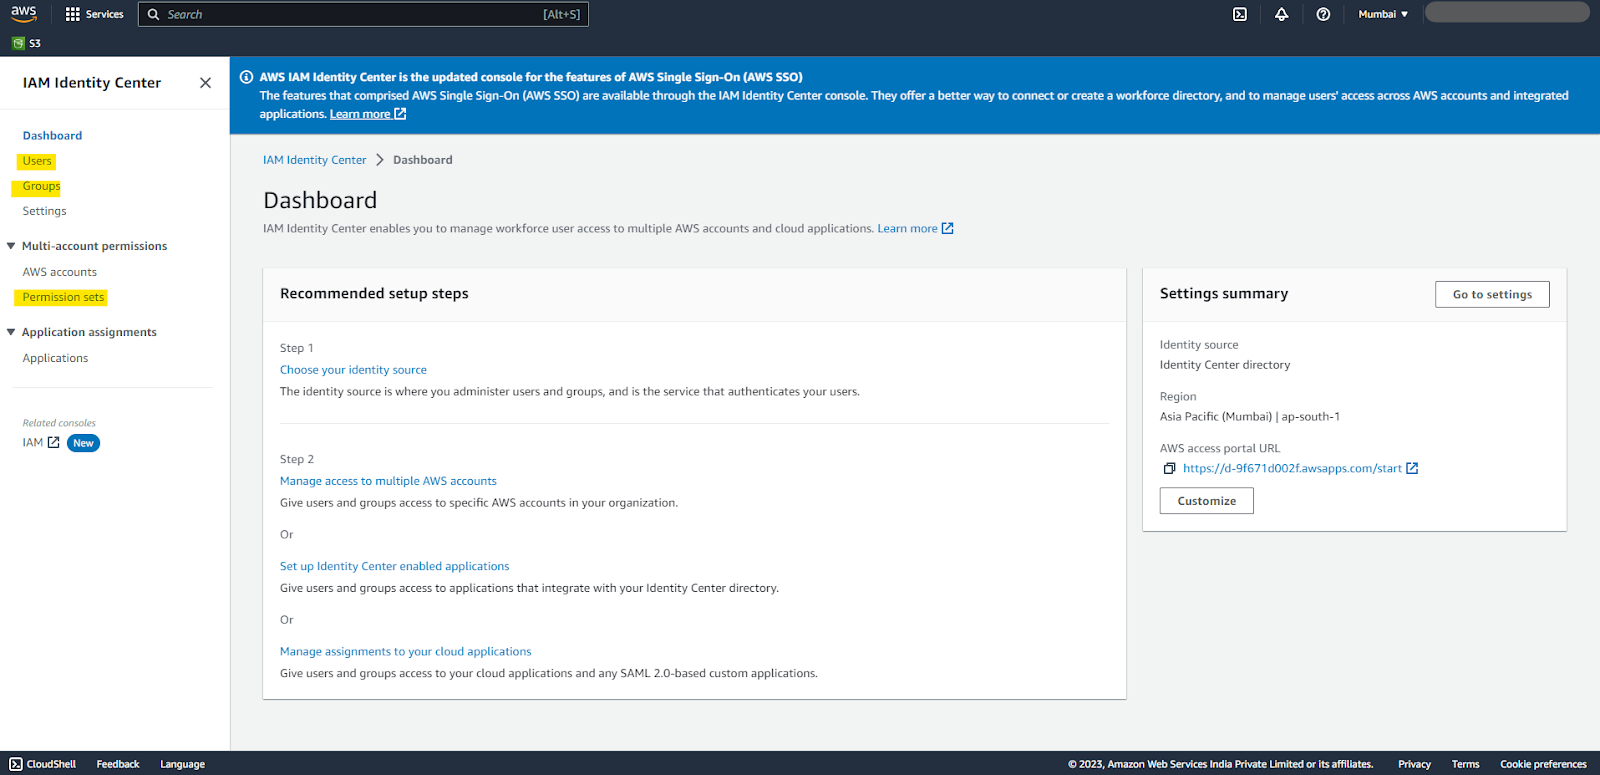
The AWS IAM Identity Center is generally used for managing workforce users. It allows us to create users and groups the same way as the IAM. In addition to that, we use Permission sets with policies defined. Once you enable Identity Center the default directory will be used as the identity source. You can also change the identity source to Microsoft AD or any other external identity provider such as Google Workspace, OAuth, etc.
Each time a user signs in to the IAM Identity Center a sign in session is created for the duration which is configured in the Identity Center, which can up to
Steps to configure AWS IAM Identity Center
- Sign into the console to enable the AWS IAM Identity Center. We will need to enable AWS Organisations in order to use Identity Center.
- Create a user and assign the user to the group.
- You will be required to choose a username and password to create a user.
- Register a MFA device for the user.
- Create a Permission Set with one of the managed policies or a custom permission using inline policies.
- Permission Set will not be provisioned unless it is added to a user or group.

- To provision the Permission Set that we just created.
- Navigate to the IAM Identity Center
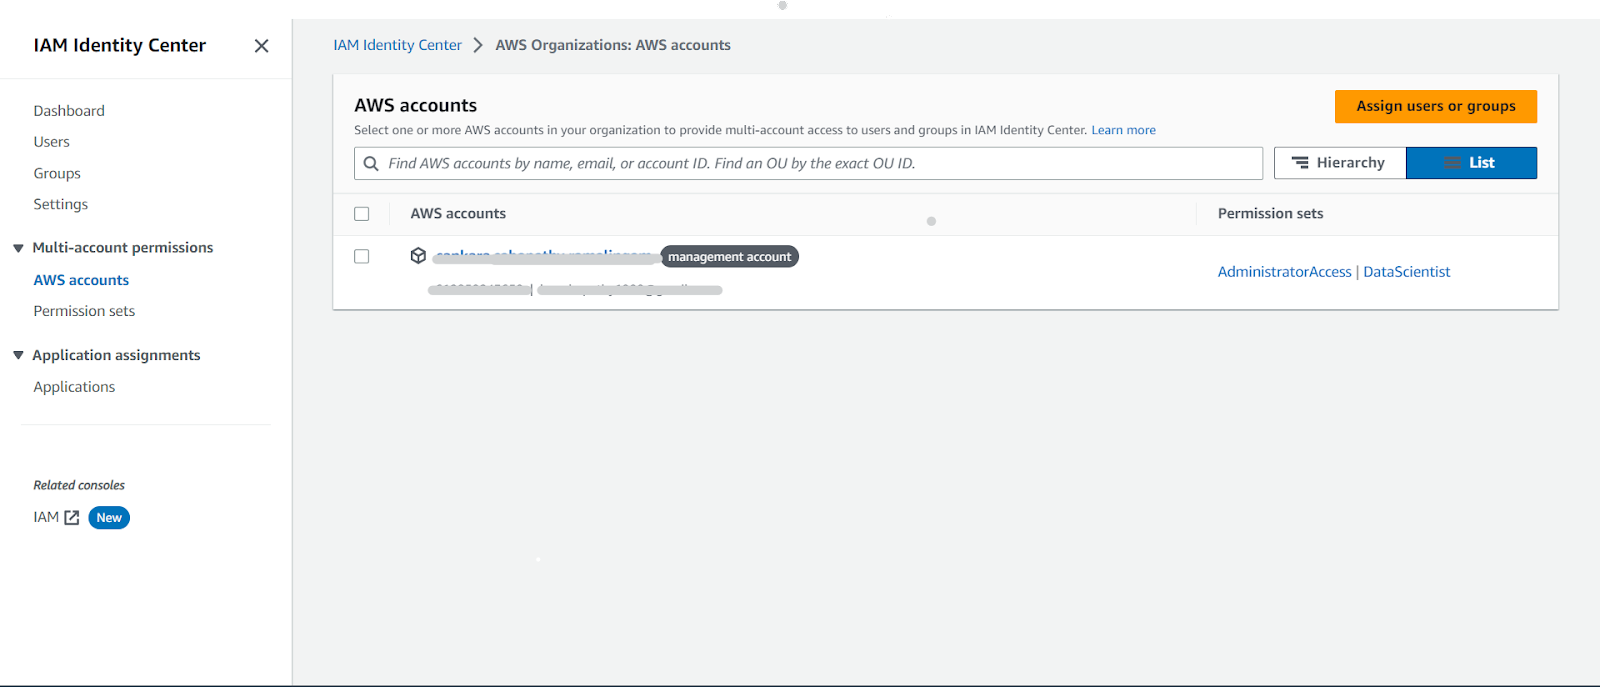
- Under Multi-account permissions select AWS accounts
- Select the account to which the user needs access (in this case, select the same account)
- Click on Assign users or groups on the top right.
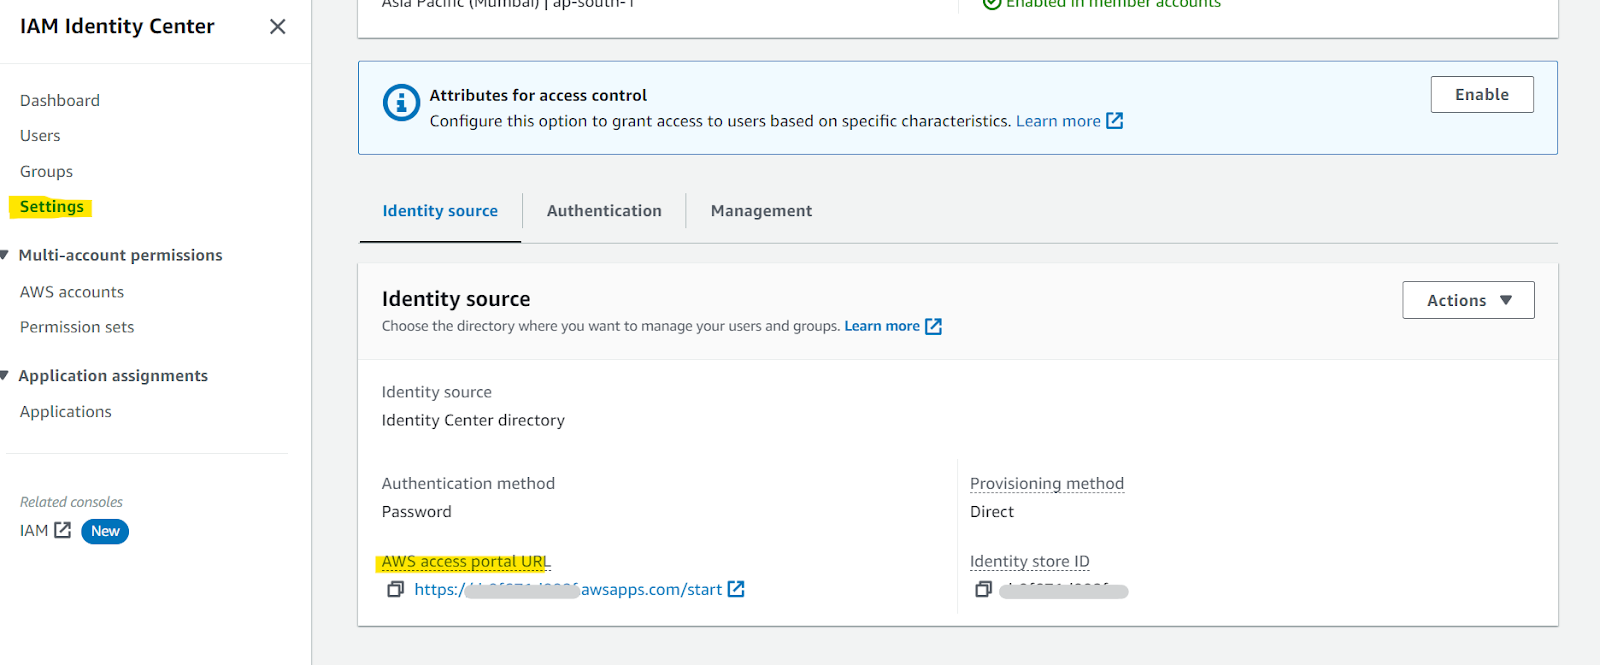
- Now you are ready to log in as a federated user with short-term credentials using the sign in link (aka the AWS access portal URL) provided for your Identity center.
- The AWS access portal URL can be seen in the Identity Center settings.
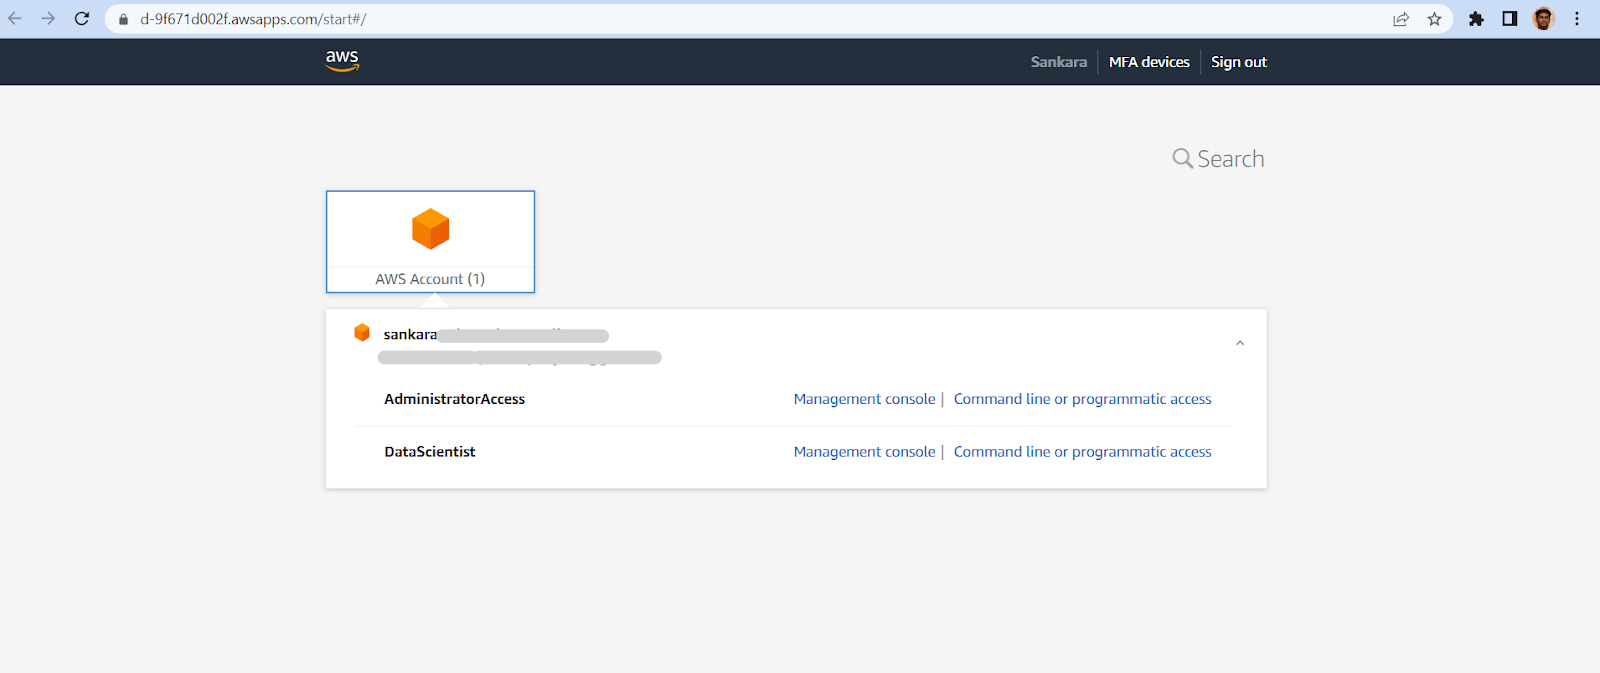
- Once you log in using your user credentials, you would see a list of accounts and roles you have access to. You can either log in as a federated user or get temporary credentials by clicking Command line or programmatic access.
If you were successful in setting up after going through all of these processes, congrats.
You can thank me later for this bonus topic below on using the development tool Leapp, which makes your life much easier.
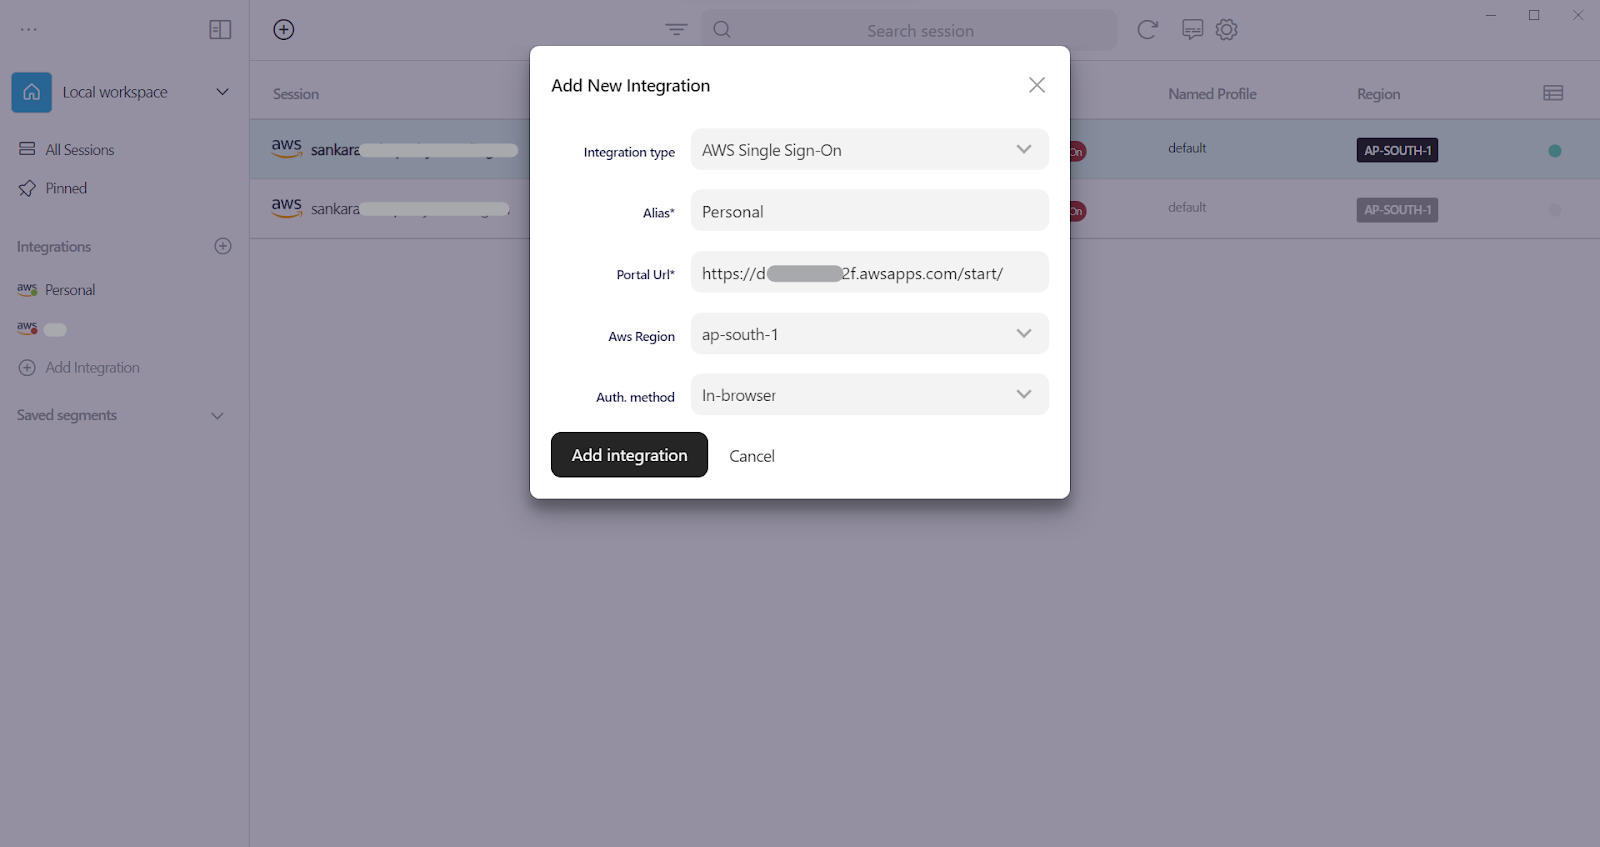
Configuring Leapp
A lot of developers out there use leapp for both AWS console and for CLI because it automatically updates the AWS-CLI profile everytime we sign in.
- Download and install Leapp from here.
- Click on add new integration.
- Select Integration type - AWS Single Sign-On (SSO).
- Enter our AWS access portal URL and click on add integration.
Now, you should be able to login through the AWS console and automatically configure your local CLI with temporary short term session tokens by just starting a session on Leapp.
Conclusion
The Identity Center also allows you to use any external identity provider such as Microsoft Active Directory, Okta, Google Workspace, etc. Usually large organisations manage their workforce by using their Active directory as Identity source for all the accounts using AWS Organisations.
Congratulations! Now you have set your AWS CLI with short-term credentials 💫
Feel free to reach out to me if you need any help.


%20(1).svg)

.svg)


